Testing and verifying your tag installation
Last updated: July 9, 2026
Before you publish your GTM changes, it's worth spending a few minutes verifying everything is working as expected. A quick check here can save a lot of troubleshooting later.
Step 1: Enable Preview Mode in GTM
In GTM, click Preview in the top-right corner. Enter your website URL and click Connect - a debugging panel will open alongside your website.
Step 2: Verify the tags are firing correctly
Navigate around your website while Preview Mode is active and check the following in the GTM debugging panel:
N.Rich Cookieless Tag - should fire on every page, regardless of cookie consent.
N.Rich Standard Tag - should fire only after a visitor grants marketing consent. If you haven't accepted cookies yet on your test session, trigger the consent banner and accept to confirm it fires.
Also check that neither tag shows any errors or conflicts with other scripts on the page.
Step 3: Publish your GTM container
Once you've confirmed both tags are firing correctly, go back to GTM and click Submit in the top-right corner to publish your container. Your changes won't be live on your website until you do this.
Step 4: Confirm N.Rich is receiving data
Check the Setup section of your N.Rich account - you should see a status table showing Cookieless and Standard mode as active. This can take up to 12 hours after publishing, so if you don't see it straight away, check back tomorrow.
If either mode is still showing as inactive after 12 hours, reach out via the chat in the bottom-left corner and our support team will take a look.
Step 5 (Optional): Manually both tags are correctly installed directly on your webpages
The Active status explained above in the Setup section confirms the platform is receiving signal overall, but it won't show you how the tag behaves on any individual page. For that, you can inspect the page source directly.
Step 1: Open your page in an incognito/private window
Use an incognito or private browsing window so you're starting with a clean session to ensure no leftover cookies or consent choices from previous visits.
Step 2: Open Inspect
Right-click anywhere on the page and select Inspect (or Inspect Element), then open the Elements tab. Press Cmd+F (Mac) or Ctrl+F (Windows) to open the in-panel search.
Step 2.1: Check on first load, before accepting cookies
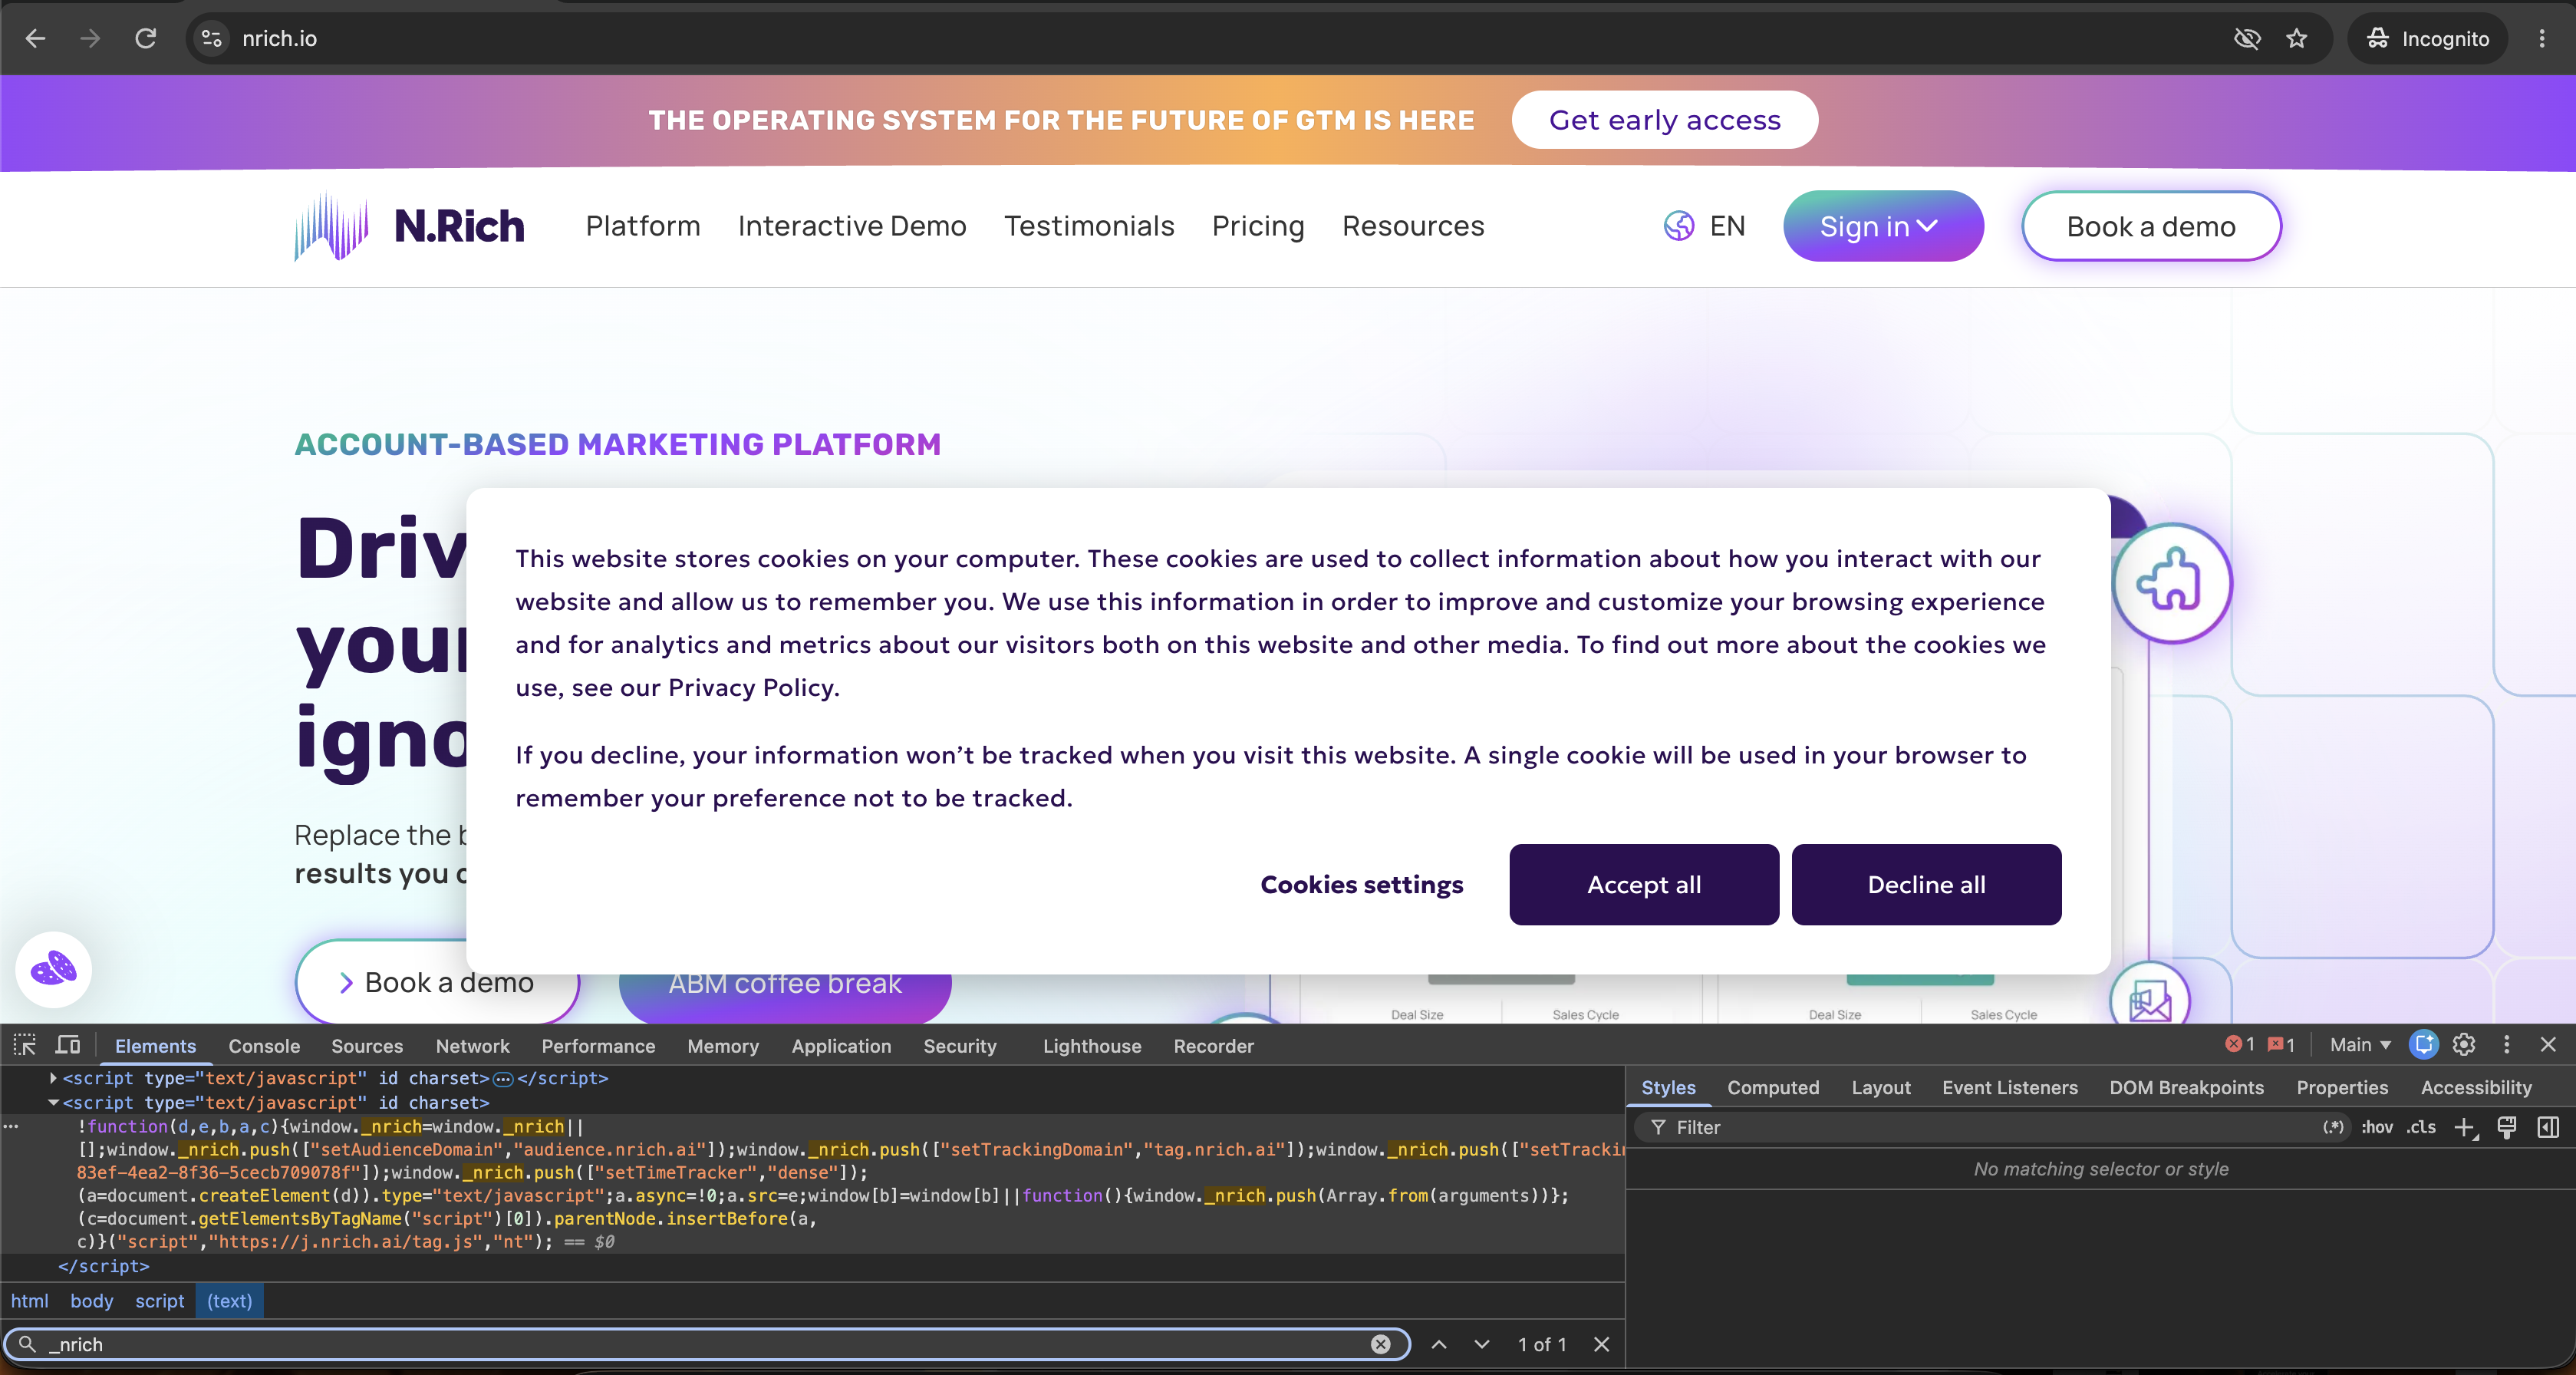
Before interacting with the cookie banner, search the page source for _nrich. It should already appear => this confirms the N.Rich Cookieless Tag is firing. It's designed to fire on first page load, before consent, so it should always be present at this stage.
Step 2.2: Accept cookies, then check again
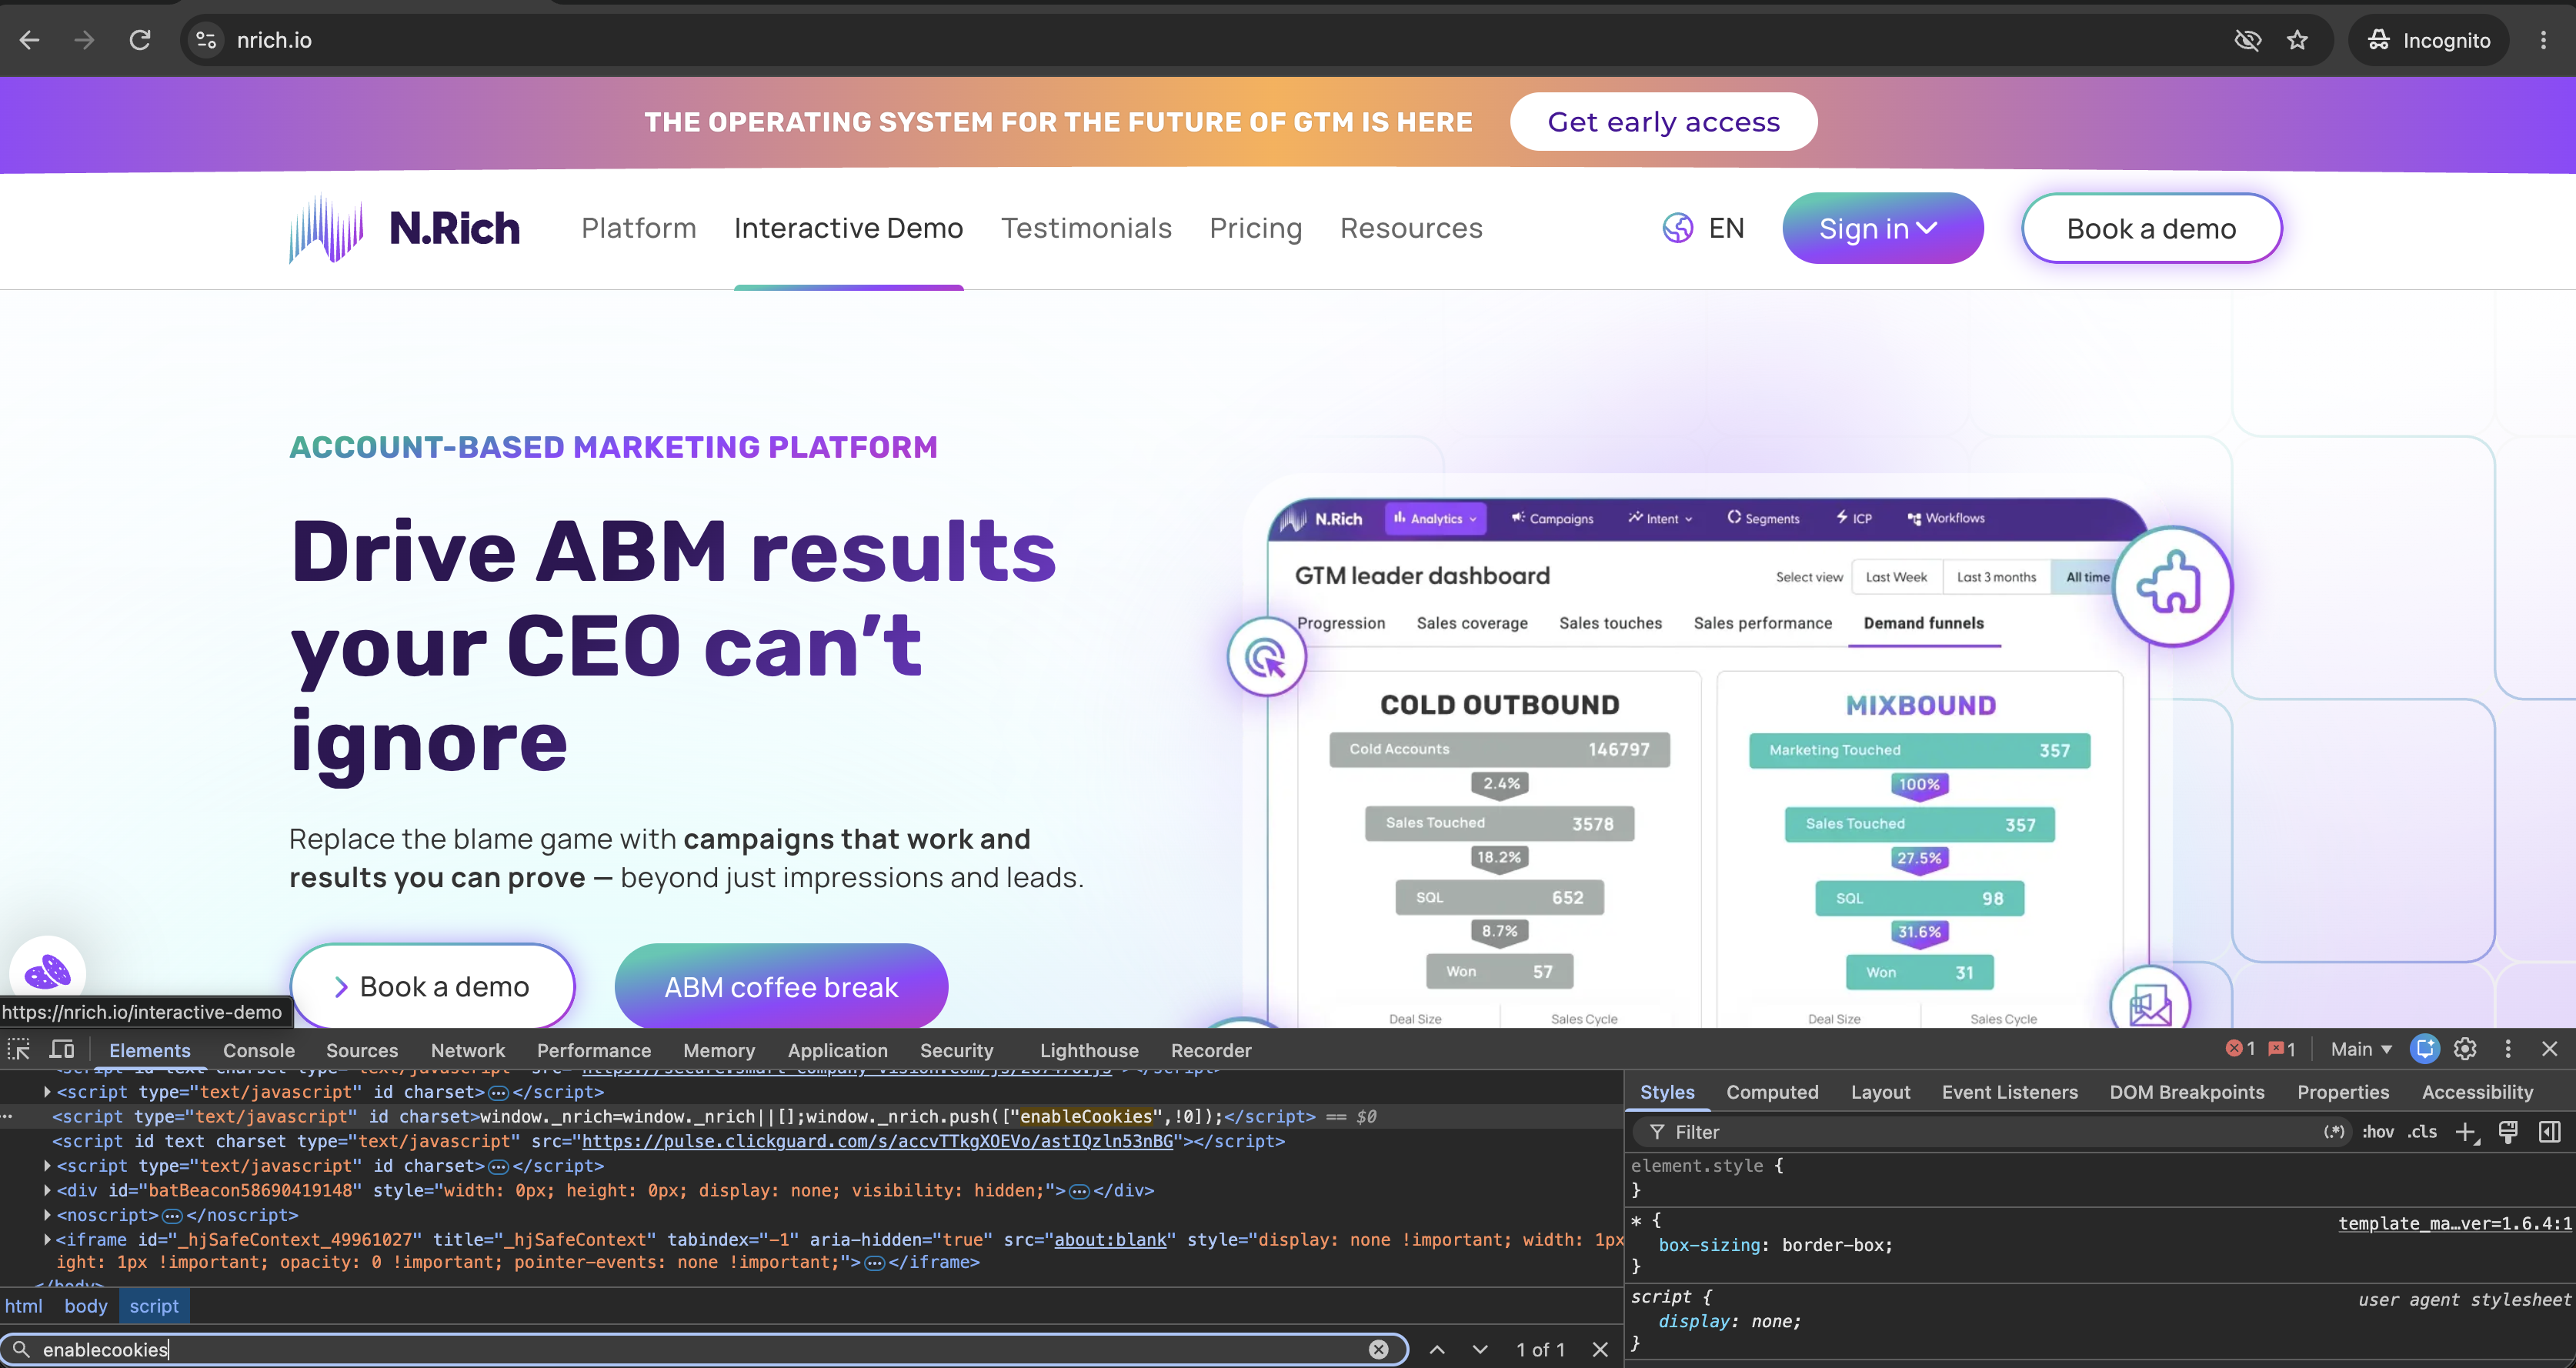
Accept cookies via your consent banner, refresh the page then repeat the search for
_nrich.Next, search for
enableCookies.The presence of both
_nrichenableCookiesconfirms the N.Rich Standard Tag has also fired.
What it means if something's missing
No
_nrichon first load, before consent → the Cookieless Tag isn't firing pre-consent. Check the Cookieless Tag._nrichpresent but noenableCookiesafter accepting cookies → the Standard Tag isn't firing on consent. Check the marketing-consent trigger tied to the Standard Tag.
Now that the N.Rich tag is installed and verified, you're ready to go! Head to your N.Rich account and start exploring your dashboards. Account-level website activity will start appearing as data comes in.
The logical next step is connecting your CRM and finishing your account setup - see the Account Setup & Integrations section of the knowledge base to continue.
Need help? Reach out via the chat in the bottom-left corner of the N.Rich platform - our support team is happy to walk you through it.